Showing posts with label red. Show all posts

Wednesday, 16 October 2013

TARTAN 3 Ways: Date/Drinks/Work


Let's talk tartan trousers.

It was love at first sight but as soon as we were home together I questioned my decision to embark on a relationship with something I wasn't totally comfortable with.Normal statement trousers are a daunting prospect enough, let alone a bright red, slightly fluffy pair. I took them on test run dinners and drinks paired with t shirt,jumpers and crop tops but it wasn't until I spotted this silky, boyfriend style t-shirt in New Look that I knew I'd made the right decision. And we lived happily ever after...(not that you can tell from my miserable expression)!

T shirt - New Look HERE
Trousers - Primark
Shoes - Matalan
Necklace - Primark
Bag  - gift


The plain colour and boxy fit of this t shirt really contrast with the bold print and heavy texture of these trousers and the whole look is pulled together with a statement gold necklace to match the accents on my bag and shoes.

In my opinion this outfit is pretty versatile and could easily be worn out for date night, drinks or a works do. To wear it during the day I'd switch the necklace for rings and the metallic courts for smart pumps all pulled together with a chunky cardigan or scarf. I've already considered pairing the trousers with sequins, clashing prints and tailored shirts so be prepared to see a lot more posts featuring these in the next couple of months!

How would you style these statement trousers?

T x

Tuesday, 30 July 2013

Love Will Tear Us Apart - OOTN


This dress is flying round the blogisphere at the moment! Every single blogger and You Tuber in their right mind has got their hands on one of these badboys and I for one can completely understand the hype. They cost £12, fit like a dream and have a Topshop worthy print that flatters every complexion!

My dress had it's first formal outing the other night when we headed out for my boyfriend's birthday supper, and it passed the food baby test with flying colours!


Dress - Primark
Boots - Matalan HERE
Lipstick - Kate Moss for Rimmel no 107 HERE

I've seen it worn with heels, hats and collars but I decided to wear mine with my current favourite stompy boots. They were a bargain buy from Matalan and I've been living in them for the last month or so. They have cut outs at the heels which I'm not a fan of but if I wear them with plain black socks only the eagle eyed would notice!


Do any of you have one of these dresses? I'd love to know how you'd style it!

T x

Friday, 17 May 2013

OOTD: Kiss Me Quick


Ahooooooooooooooy there! Felt like I should have been wearing a sailors cap with this jolly little outfit. 


T shirt - New Look 
Skirt - New Look
Tights - COS
Boots - Primark 

Lipstick - "Plum" Forever 21
Necklace - Morrocco

Look at my crazy happy face!! I picked up 2 of these long sleeved Breton tops when there was a "2 for £8" deal on and this little denim look skirt was only £15 - hell yessssss! 

If you haven't been into New Look for a while you really should pop in and have a mooch round. They've got some lovely stuff in stock at the moment and it seems as though the days of scattered diamante all over everything are gone thank goodness. 

This felt like a very summery/nautical little look especially paired with my burgundy Primarni boots but sadly the weather didn't hold out and I was changed back into my onesie pretty quickly after these pictures were taken. 

Hope you're all getting super excited about the weekend

T x


Sunday, 21 April 2013

DIY Red Velvet Bow

Yesterday I stumbled across a photo of the beautiful Bip Ling wearing a PPQ red velvet hair bow and fell in love. 

A rummage through the scraps box at home confirmed that this bow and I were meant to be as I found an old red velvet sash off one of my grandmothers old ballgowns (this wasn't cut up willy nilly, she was a size 4 ish during the war and her waist is a gazillion times smaller than mine will ever be!)...fate or coincidence, either works for me!

This took me about 45 mins to make and cost nothing, easy peasy. Obviously you could knock one of these up with any large scrap of material you may have lying around, denim or pleather would look amaaaaaaaaazing!

You will need:
  • A large piece of medium to thick weight material (the heavier the material, the better it will hold it's shape)
  • Tape measure or ruler
  • Sharp scissors
  • A glue gun
  • Pins
  • A needle and thread
  • A hair grip
1. Measure and cut the material for your bow and lay it out flat. Simples!
 For my pretty hefty bow I used a piece of velvet measuring roughly 12.5" x 8" but depending on what size you want your measures can be changeable.
As my material is originally from a sash it does have seams running through it but they don't really appear on the velvet side.

2. Use your glue gun along the long edges and fold them up about half an inch - just helps to keep things tidier.


3. Fold the material longways and pin the rough edges together.


4. Use the needle and thread to do a simple running stitch across the top - be careful not to pull your stitching too tight or it will gather the fabric.


5. Once  you've sown the top together, go over your last stitch a couple of times to finish it off and then turn the material inside out to form a tube of material, with the seam you've created in the centre of one side - this will be the back.


6.  Flatten the material and use your glue gun to close the open ends of the tube.


7. Using your thumb and first finger pinch the bow together so that it gathers to form a bow, then pop a pin through the top of the gather to the bottom to hold the shape.
Make sure that the gather is right in the centre of the bow otherwise it will end up looking a little lopsided.


8. Using the scraps from your original fabric cut a length approx 7" x 1.5" then use your glue gun to glue it in half lengthways. 
Remember that if you are using a material like velvet you will need to glue on the non furry side so that the velvety side will be on the outside of the bow. 

9. Dab a little glue on one end of your now shorter and sturdier ribbon of material and attach it to the top of the gather on the centre of the bow - just where you put the pin in to keep the shape. Take the pin out and wrap the rest of the ribbon round the bow tightly to hold the gathers and attach the other end just behind the end you have just stuck down. You should have created a ribbon that runs the whole way round the centre of the bow. 

It should look like this from the front. 

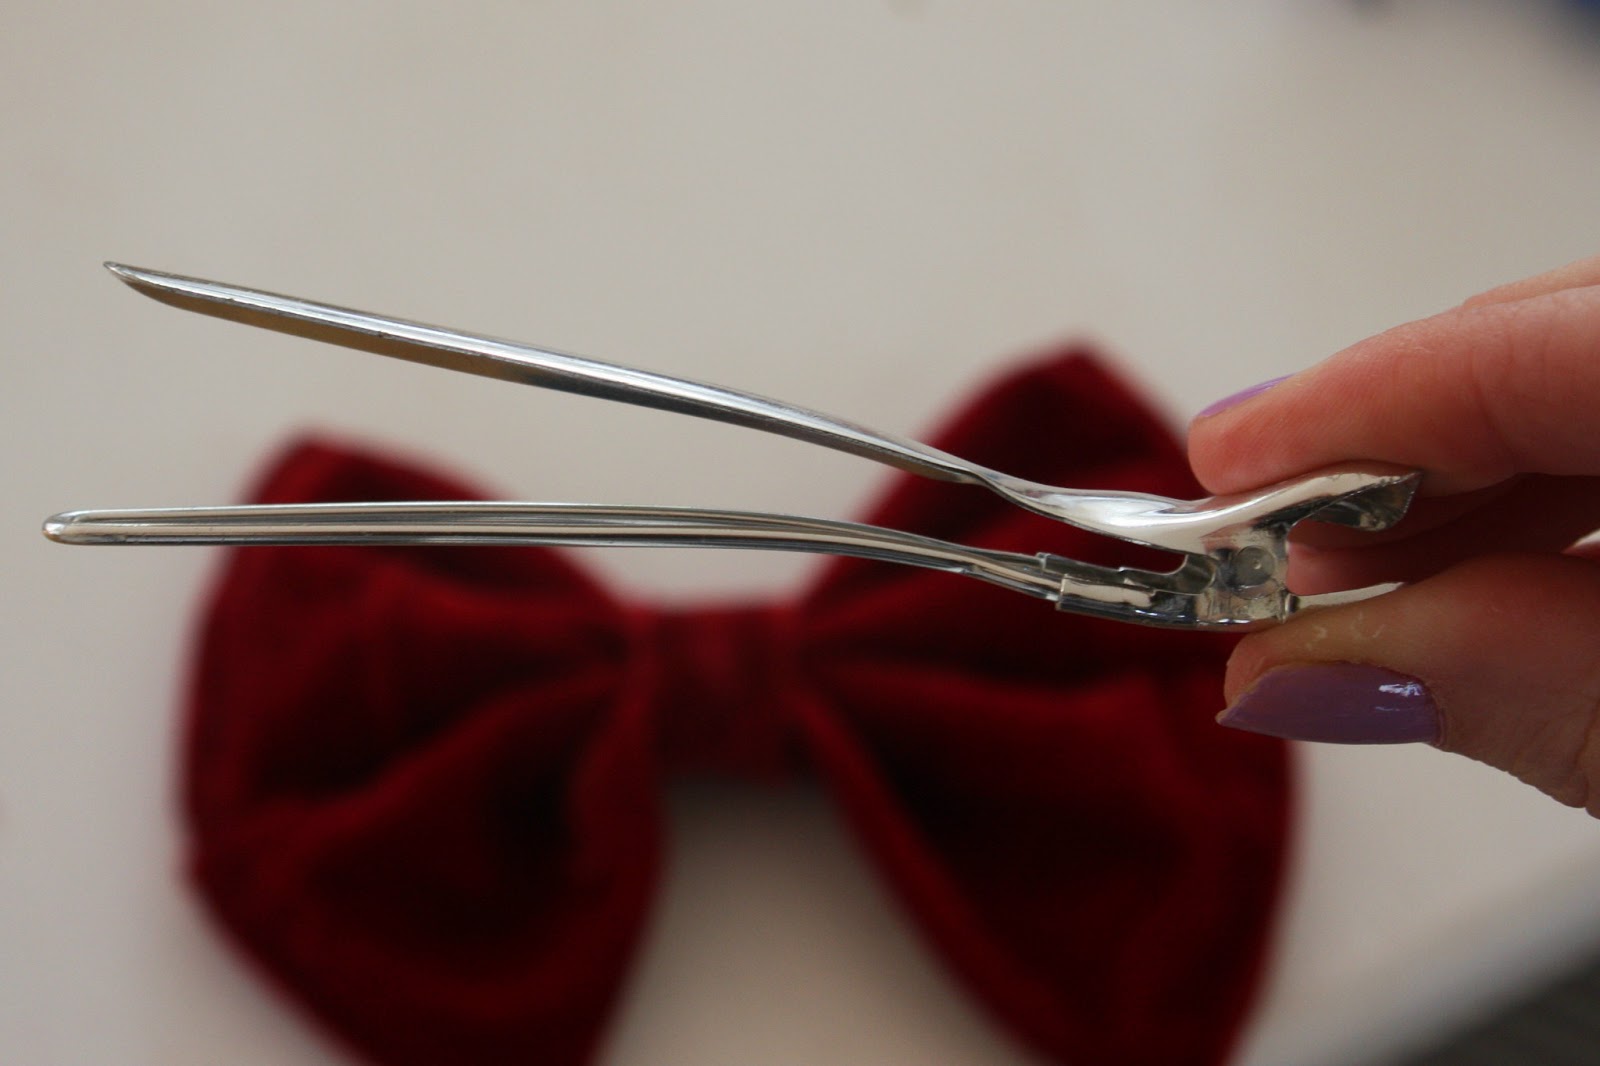
  10. Having created your bow you need to create a means to attach it to hair/clothes etc. As velvet is quite heavy I decided to use a large crocodile style grip that I found lying around which seems to work very well.  


I just slid the larger side of the pin (top side in this picture) underneath the central ribbon of the bow so it sits within the gathers.

Eh voila!


What do you think?


I love the way this brightens up a simple t shirt and am already scouting for a more summery material for my next one and oooooh maybe one with studs in...watch this space!

My beautiful pooch Hector wants one too!

 I'd love to know if any of you have tried making your own versions, just holler at me!

T x


LOOKBOOK